
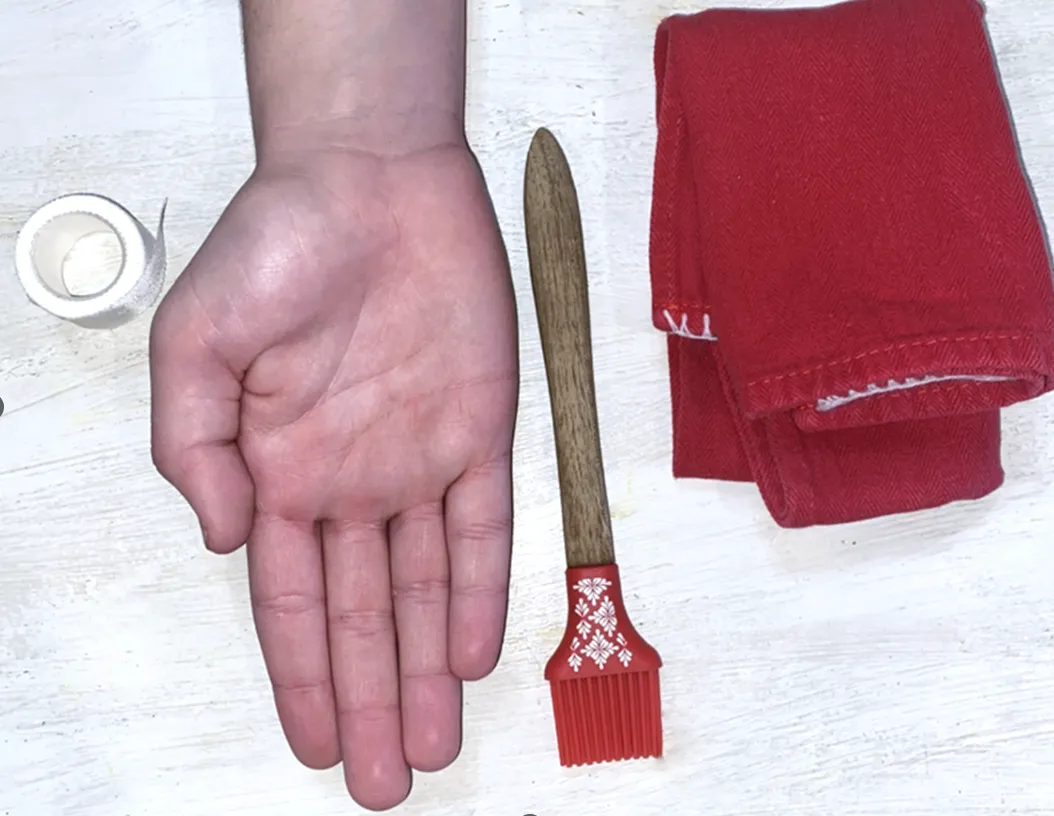
DIY Hand Splint
A step-by-step guide for making a low-cost DIY hand splint at home.
Overview
Hand clenching is a symptom caused by Amyotrophic Lateral Sclerosis or stroke where the hand involuntarily clenches at random moments. This can cause extreme pain for the patient. A hand splint can be purchased or made at home to help with hand clenching. By keeping the hand in a stationary position, the wearer can mitigate the symptoms and ease the pain as the hand tenses.
Accessibility Snapshot
Cognitive, Fatigue, & Focus
- Step-by-step
- Low decision load
- Low memory load
Mobility & Reach
- Seated-friendly
- No overhead reach
- No floor-level work
- No climbing
- Balance-safe
Motor Control & Strength
- No heavy lifting
Sensory & Environmental
- Hearing not required
- Low-noise & low-vibration
Materials
- 1 × Gauze ($6)
- 1 × Rigid object like a stick, trekking pole, or small board ($15)
- 1 × Medical tape ($5)
Steps
Step 1: Set up
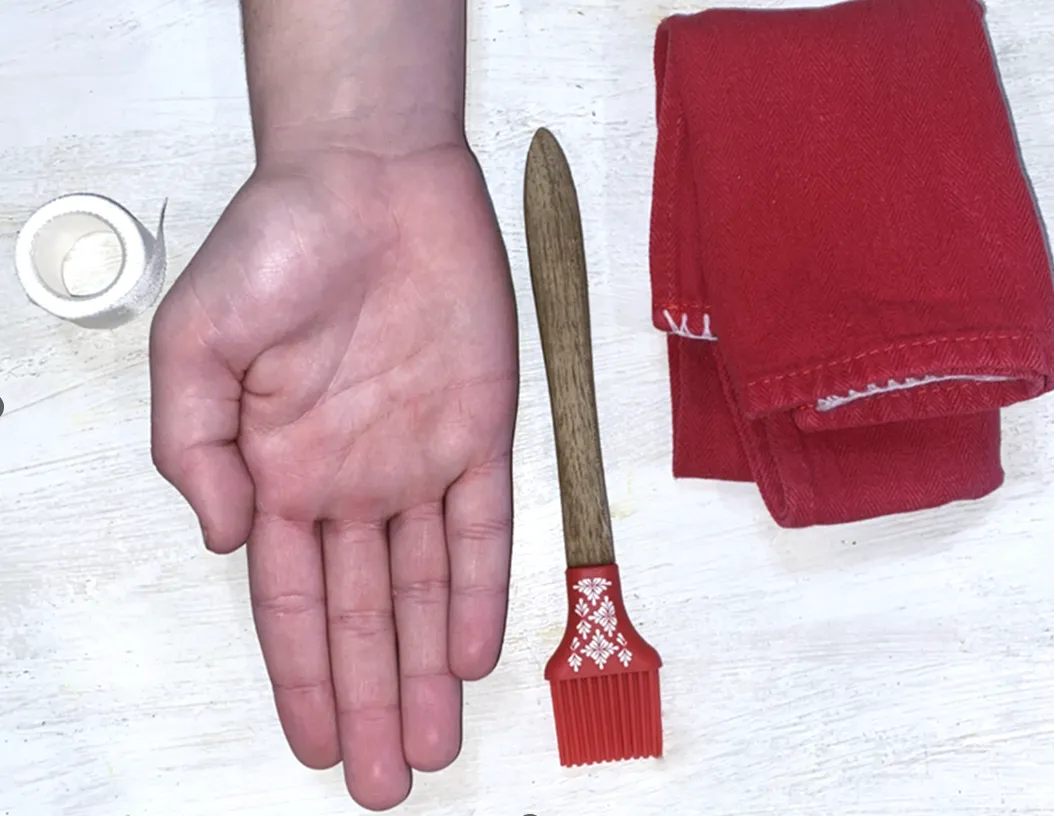
Place the hand flat, palm up, with the fingers and wrist straight. This is the position that we will aim to keep the hand at, even when the tension begins.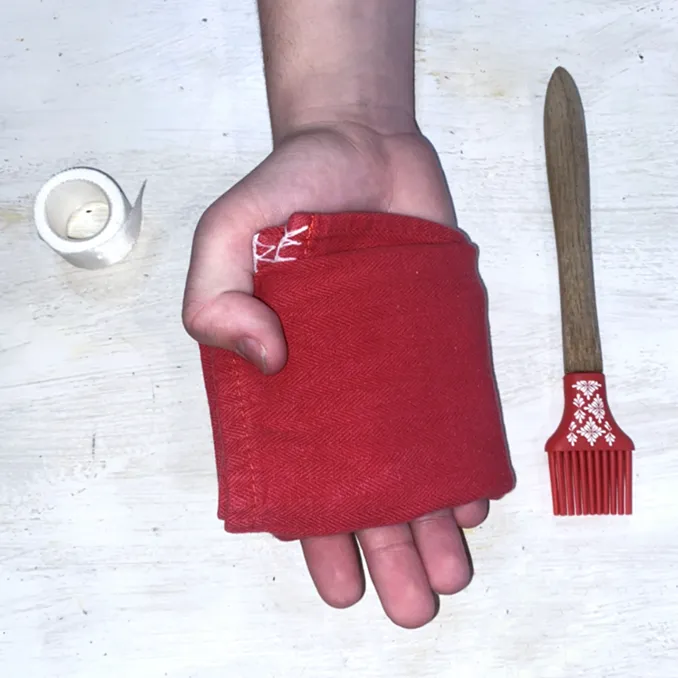
Step 2: Wrap Hand
Wrap the hand in gauze or cloth starting above the thumb to the base of the fingers in some form of padding. The fingertips must remain uncovered for later application and look for signs of circulation loss. This will create a barrier to protect the skin. Wrap tightly but make sure circulation will not be inhibited. It should feel stabilizing, but not painful or uncomfortable.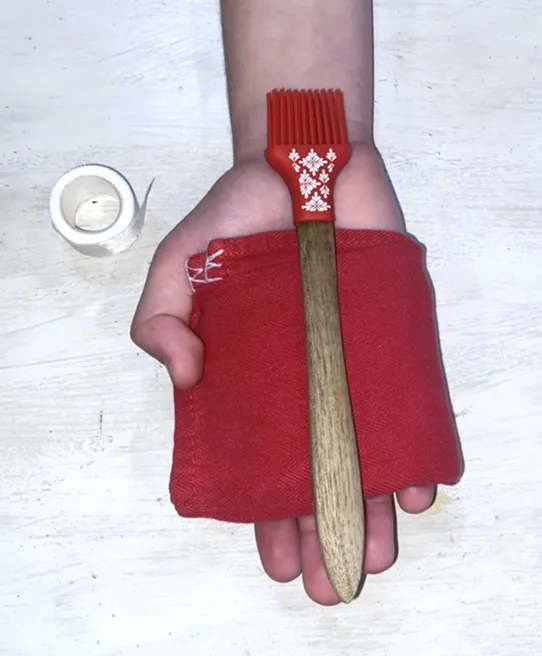
Step 3: Stablize Hand
Apply a rigid object parallel to the palm of the hand, going from the tips of the fingers to the base of the hand. This can be a wooden stick, a small board, or any other sturdy object. If the object is longer than the length of the hand, it will still serve as a proper hand splint, but mobility of the arm will be limited. The object should be strong enough to resist breaking or folding too much as the person’s hand clenches.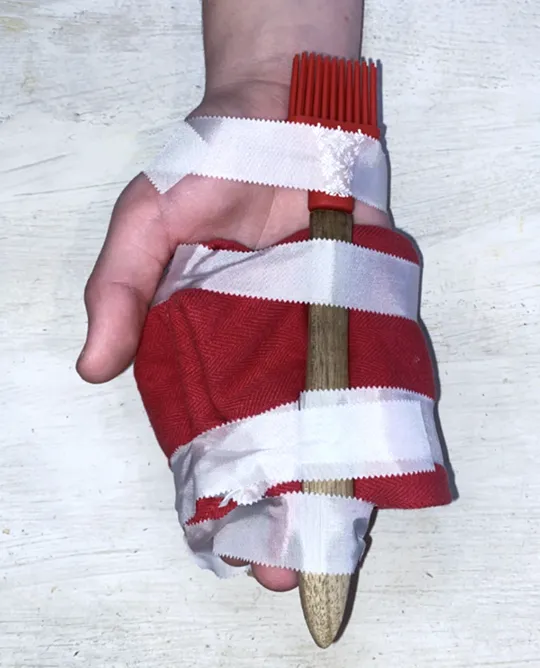
Step 4: Fasten Splint
Fasten your splint with medical tape. The tape should touch exposed skin to adhere properly. Apply it around the top of the splint, so likely around the fingers, and the base, so likely at the top of the wrist or the base of the hand. For extra support, apply to the middle of the palm starting at the top of the thumb joint, although this round of tape will likely not touch skin due to the cloth/gauze. This should feel secure, but not painful or overly tight.Step 5: Check for Circulation
Check for signs of circulation loss. It is imperative that the splint does not cut off circulation to the hand. Check that the fingers do not turn any shade of blue or purple, show signs of swelling, or uncharacteristic paleness. Regularly check for about 5 minutes.
Important Considerations
It is possible to cut off circulation if the splint is fastened too tightly. Ensure and continually check that the tips of the fingers do not lose their sense of touch or natural color. If the fingers begin to appear purple or blue, remove the splint immediately, warm fingers with warm water, and massage fingers until the discoloration has ceased. If fingers remain purple or blue, seek medical attention.
Troubleshooting
If struggling to adhere to medical tape, try exposing more skin.
Adaptations
It is possible to use a rolled up towel or T-shirt rather than a stick. The stability will slightly less, but it will keep the hand in the desired position.
Reviewed by: Xander Rouk
Version: v1.1
Adapted from: n/a
Medical disclaimer: The information in this guide is for general educational purposes only and is not a substitute for professional medical advice, diagnosis, or treatment. Always seek the advice of a qualified healthcare provider with any questions you may have about a medical condition or care plan. Read our Safety & Policies for more.